Tuesday, January 28, 2014

10 Questions You're Too Embarassed to Ask Your Wedding Photographer


Wedding photography is a lot of work and for that reason, I don't photograph my close friends' weddings.  I'd much rather enjoy a day of love, laughter and booze than run around like a crazy lady with a camera in front of my face the entire time. Of course, I take engagement photos, design invitations and programs and most importantly, I can give my friends the answers to their questions that they are afraid to ask their wedding photographers.  Whether they feel silly asking or they are afraid to offend their photographer, I've been asked the following questions by more than one person!


1. Do I really need to take engagement photos?  What do I use them for?
A lot of photographers included an engagement session with their photography package. This benefits both you and the photographer.  You can get a feel for the photographers style and personality while the photographer gets to know you and your personality.  On your wedding day, your photographer will be by your side for most of the day.  It's important to get to know them before the big day so you are comfortable with them and they are with you.  Of course, you can always meet with your photographer for coffee and to see if you click before you make your decision to hire them, because liking your photographer is just as important as liking their work.

So now you've got these engagement photos of you and your beloved gazing into each others eyeballs... what the heck do you do with them?  

- Display them at your wedding shower
- Print them on your Save the Date cards and wedding programs
- Use them on your wedding website
- Engagement announcement in the newspaper
- Use them in your guestbook. (I think it's a great idea to add prompts to your guestbook to encourage your guests to write special messages and advice instead of just signing their name.)


2. Do I feed the photographer at my wedding?  Should I assign them a seat?
Would you work like a dog for 8+ hours and not take a quick break to eat?  No way. Remember that your photographer is constantly running in circles around you and not taking any breaks so that they can capture all your special and magical moments. Definitely feed them!  Besides, no one wants their picture taken while they are eating, so your photographer will have some down time.  Assign your photographer to a table.  If you don't want to give them a place card or put them on your seating chart, that is okay - but just make sure you remember to tell them that there is a seat for them at Table 15. If you have several vendors, such as photographers, DJs, and videographers, you can reserve a table for them.  Don't make your photographer wander around waiting for everyone else to start eating to scope out the available chair. They'll want to get back to business quickly, so make dinner easy on them. 

3. How will the photographer know who I want formal photographs taken of?
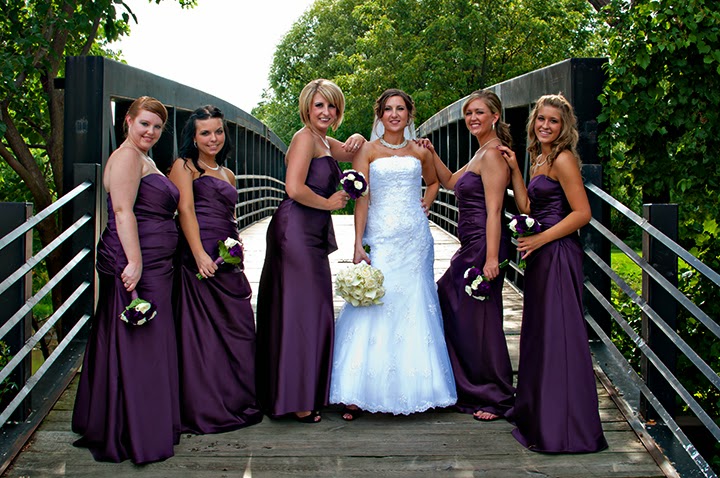
That's easy - just tell your photographer. I tell my clients to provide me a list of any family groups they want photos of.  It is not uncommon for the couple to have divorced parents and sometimes that can get awkward for everyone when the photographer doesn't know.  This way, I can consult my list and call out the names of everyone the bride wants in the shot.  If you don't give me a shot list, that's okay too - I just call out the basic configurations (parents/grandparents/siblings) and then ask the bride along the way if there is anything else she wants. If you have any must-have group shots, definitely make a list - this way you don't forget.  You have a million things running through your mind during your wedding.


4. Is it rude to show the photographer examples of pictures I want taken?
Absolutely not. The photographer probably has a style of their own that you've already checked out before you booked them - but it doesn't hurt to show them photographs that you have seen that you liked.  This will help them get a feel for your style.  Of course, don't think that just because you show your photographer a photo of a couple romping through a corn field at sunset that you will get that photo at your wedding day.  Unless of course, you are getting married in a corn field at sunset.

5. Can't I just have my uncle/cousin/neighbor take the photos?
If you know someone with wedding photography experience who OFFERS to take photos at your wedding, absolutely. As a rule, if this is a person who you would want at your wedding (even if they didn't have a nice camera) I would think twice about having them photograph your wedding. The reason you have a wedding reception is to celebrate your marriage with your friends and family.  The photographer doesn't get to celebrate the same way as a regular guest.  Of course, I wouldn't tell a family member to not bring their camera to your wedding - the more pictures the better - but I would hire someone else for your primary photographer.  (Also - this relative/friend is probably your best resource at finding a great photographer. Ask them for their opinion or a referral when picking a photographer.)


6. When should the photographer start?  When do they leave?
Some of my clients have asked me to come early in the morning to be part of the entire "getting ready" process on the day of the wedding.  I find that most of the photos I take during this time will go unused by the client.  Let's face it, do you really want a photo of yourself in a baggy button-up shirt before your make-up is on?  I recommend to my friends to have their photographer meet them when they have about 30 minutes left at their "getting ready" location. This way, I can photograph the final touches to the hair and make-up and putting on the dress, jewelry and shoes.  I also will take some photos of the bride and bridesmaids hanging out and having a little fun.  Then I leave and head to the ceremony location to get a few photos of the groom and groomsmen as they pin on their boutonnieres and seat guests.

As the guests arrive and as dinner ends, I walk around taking photos of couples and guests mingling.  You will want your wedding photographer to stay at your reception until all important traditions are done. This includes the cake cutting, first dances, garter/bouquet toss and any other special customs or traditions you are planning on doing at your reception.  Soon after the first dances, the DJ usually plays a popular slow song and a good dance song to try to get everyone of all ages on the dance floor.  By this point, I've photographed most everyone at their tables and everyone who is dancing.   From here on out, your friends and family should do a good job of capturing anything fun that happens.  I suggest to my friends that they schedule their photographer to stay for 2 hours after dinner.


7. Is an expensive photographer better than an inexpensive photographer?
The price range of wedding photography is very dramatic. You can find a wedding photographer for $500 or $5000.  Regardless of your budget, you should be able to find a photographer who does good work that you genuinely like as a person.  Generally speaking, an excellent photographer with 30 years of fulltime experience is going to charge a heck of a lot more than a newcomer who is turning their hobby into extra income.  They both might take gorgeous pictures, but one may come with a much  higher price tag than the other.  With the internet, we have the ability to look at the work of many photographers without having to leave your house (or even talk to them). On a photographer's website they are usually going to post their best work from their most beautiful weddings.  If you aren't impressed, move along.  If you are, you can ask a photographer to show you more samples of their work.  I recommend asking them if you can view an entire wedding.  This way you see what they capture throughout the entire day.


8. Should I order prints or digital images from the photographer?  What about an album? 
I suggest you purchase your digital images from the photographer with a shared copyright release.  This means the photos are yours to print as you wish for your personal use.  But note, a photo printed at a drug store will not be the same quality as photo printed at a professional processing lab.  The printers at the drug store aren't calibrated or maintained as well. The drug store photo doesn't look awful but it sure as heck doesn't look as beautiful as a professionally printed photo.  That being said, I suggest you order any large photos that are you displaying your home from your photographer and print the smaller photos yourself.

Most people are familiar with photo books that take only minutes to create online.  These are cute and fun when filled with your personal photos and I suggest you take advantage of the great discounts and coupons you can find online.  However, a professionally made wedding album is timeless and beautiful.  When you meet with your photographer, ask to see a sample wedding album.  Once you see an album in person, you will understand why they cost so much more than a DIY photo book. My recommendation: purchase your wedding album from your photographer and create your own photo books for your parents or using other fun photos from your wedding that didn't make the album.


9. How many photos do you take at a wedding?  Do I get them all?
I snap approximately 100 pictures per hour.  Sometimes more.  Sometimes less.  Often when doing formal family group photos, I take several shots of each group in case anyone has their eyes closed or looks away.  (Which  happens often.  There is a lot of commotion at a wedding and its hard to get everyone's attention at the same time.  Especially groomsmen who have had a few drinks already...)  When all is said and done, I usually give my clients about half of the photos I've taken... which is still usually over 500 photos.

10. What happens if your equipment fails?
This is a great question to ask your photographer.  A well prepared photographer carries back-up equipment.  I bring two cameras, several lenses and flashes as well as extra batteries, chargers and memory cards with me.  Ask the photographer that you are planning to hire this question.  If a photographer doesn't carry extra equipment, you may need to think twice about hiring them.

Bonus Question! What does the photographer wear to the wedding?
Surprisingly, I get asked this question a lot.  I can't speak for all photographers, but I usually wear all black.  Depending on whether I anticipate being warm or cold, I wear either a simple dress or dress pants and a sweater. The goal is to blend in.  I'm going to be capturing all the action and I don't want anyone's attention to be on me.


Wednesday, January 22, 2014

DIY Photography Light Box Tutorial


In addition to be such an awesome blogger, I am also a photographer. (Check out some of my work here on my Facebook Photography page.) I'm a lifestyle photographer, meaning I don't shoot in a studio setting. Wherever my clients want to take pictures, that is where I go.  Which is awesome for things like weddings and senior pictures - but what about products, food and jewelry?  For taking those shots, I built my own Photography Light Box using supplies I already had at home.


With a Light Box, you can take photos of products (like this cute cute flash drive!) that look much more professional than a photo you took of something that was sitting on your kitchen counter.  The product is really the center of attention and pops.  It's also very true that a photograph that looks nicer is going to get a second look - even if the content is the exact same.


Supplies Needed: a big cardboard box, tissue paper, poster board, tape, box cutter


Cut your box: When selecting a box, pick one that is big enough to put whatever it is you want to photograph inside of it.  Using your box cutter (or an exacto knife or scissors) cut off the top flaps of the box.  Then cut a big square hole in the top and two sides of the box.  You will want to leave the back and the bottom in tact.  (See photo above... Lucy is admiring my handiwork.)  Leave about an inch or so between the edge of the box and your hole.  I clearly did not do a very good job at making straight lines, but that doesn't really matter.


Attach tissue paper:  Cut your tissue paper to be slightly bigger than the holes you made in the box.  Use you tape and attach the tissue paper to cover each hole.  You can also use vellum poster board for this step.  It is much sturdier.  I've already poked my finger through the tissue paper a few times when transporting it around the house.  On my next version, I will find the vellum - but I only had tissue paper on hand.

Insert poster board: Cut your poster board to the width of the inside of your box.  Slide it into the box.  You can take it in or use Velcro - but I found it sits in there pretty good without any help.  So I didn't attach it.  Plus, I don't always want it inside (you'll see why in a few more steps...).


Light 'em up!: I had these handy dandy studio lights and light stands which conveniently workd with my light box.  You do not need to be nearly as fancy.  Lay a couple desk lamps or bright flash lights next to your box. You can also shine a light into the top of your light box.  I found that putting this on my dining room table, the light from the chandelier above works best.


Snap away: I grabbed these confetti glasses to test my Light Box.  (You can see the tutorial on how to make this Anthropologie knock-off here.)  I shoot using a Nikon DSLR camera, but you can use your point and shoot digital camera to get pretty good results too.  In fact, I took a few photos on my cell phone and they looked decent!


Compare the above pictures.  These are both straight out of the camera images. Same products, same cameras. The left picture has a lot of flash glare on the robots and the background is distracting.  The right picture is ALL ROBOT.  If you are trying to show a specific item in a photograph it's really best to cut out any distracting junk, even if it is your cool retro record player in the background.


Change it up: I used rolls of wrapping paper and a couple chip clips to make an easy background change!  These are rolls of paper from the dollar bins at Target... they were the perfect width for the box I selected.  Yahtzee!


Play with angles: Get up close and personal and take pictures of your product from above and down low.  Take a bunch of pictures and afterwards pick the one that you think looks best.


Jazz it up:  Stage your photos by adding a little something to picture.  In the photo above, I used a pretty gift back as a background behind these pancake muffins.  (Check out this recipe if you love pancakes as much as I do!) You can also use things like scrapbook paper, a cutting board or fabric scraps to add a little pizazz to your photos.
 
All in all, this project took me about 15 minutes to put together and has provided me with a TON of awesome photos. (Maybe next time, I will make a box big enough to put my dog in.  I can't stop taking photos of her...) Let me know if you make your own light box - I would love to see the pictures you come up with!

Friday, January 17, 2014

Avocado Corn Salsa Salad


This hybrid salad/salsa is so delicious, I have to force myself to not eat it all in one sitting.  The best part is you can serve it as a salsa with tortilla chips or you can just use a fork and dig in as is!  Most recipes I have seen for a similar salad use lime juice and cilantro - which had steered me away from making this, because I cannot stand cilantro.  At all.  Not even a tiny bit.  I swapped out lime juice for an oil/vinegar dressing and use taco seasoning instead of cilantro which resulted in my yummy Avocado Corn Salsa Salad.


Ingredients: corn, cucumber, tomatoes, onion, avocado, oil & vinegar dressing, taco seasoning


Chop! Chop! Chop!: Peel and slice your cucumber, chop up your tomatoes and dice about 1/2 small onion and throw them all in a big bowl.  I used English cucumbers, yellow onion and roma tomatoes - but any kind you want will do.  Note: If you are going to serve this as a salsa, dice your vegetables into smaller pieces than if you are planning to serve it as a salad.


Add avocado: Cut the avocado into about 1/2" chunks and throw it into your bowl. I'm not embarrassed to admit that I one googled to figure out how to cut an avocado.  (Seriously, I watched this video.)  Quite frankly, they look disgusting and I was afraid to cook with avocado for the longest time - but they taste amazing so it's totally worth it.


Add corn: I used canned sweet corn.  I had two cans (in the picture of the ingredients) but after mixing in one can, I decided that was enough.  You can also use thawed frozen corn.


Dressing and Seasoning: Add 1-2 tsps. of taco seasoning and a few table spoons of dressing.  I used Newman's Own Oil & Vinegar.  Italian dressing works great too.


Toss & Serve: Toss it all together and serve!  This salad is best served the same day it was made.

Variations: Substitute or add any of these ingredients: black beans, zucchini, cilantro, minced chilies or jalapenos.

Tuesday, January 14, 2014

Chickpea Cucumber Salad


The mid-winter blues have been hitting me hard lately - so I thought a nice summertime salad might trick my brain into thinking it was 70 degrees outside.  This salad has only a few ingredients but they taste SO GOOD together.  It's also very light, so I like to pair it with BBQ or something heavy.  (Tonight we had meatloaf for dinner.)


Ingredients: onion, cucumber, tomato, chickpeas, seasoned salt and any vignette dressing


Chop stuff up: Drain a can of chickpeas and pour it in a bowl. Peel your cucumber and slice it.  I use English cucumbers because they don't have as many seeds. If you use a regular cucumber, you can slice it long-ways and then use a spoon to scoop out some of the seeds.  They don't add to the flavor and they water down the salad. Chop up about 1/2 a small onion. Chop a few tomatoes.  I used roma tomatoes because they seem to have more "meat" and less "junk".

 
Dressing/Seasoning: Add about 1-2 tsp. of your favorite seasoned salt.  Mine is by Tastefully Simple.  Then pour little vinaigrette over your chopped stuff. Maybe about 3 tablespoons. Your ingredients all have a lot of water in them, so you don't want it to be soggy.  I used a light caesar vinaigrette this time, but any you like will do. Or you can just add some olive oil or Italian dressing.
 
 
Wait and serve: Refrigerate your salad for about an hour before you eat it.  It will taste delicious right away, but it will taste AMAZING if you wait.  Then save your leftovers for lunch the next day.  It will be even better!

Monday, January 13, 2014

Garlic & Oil Spaghetti

 
If you haven't noticed, around my house, we like our food spicy.  Andouille sausage is one of our favorite meats to cook with.  Not only is it spicy and delicious, but the sausages are pre-cooked and are super easy to prepare.  I usually slice the sausages and cook them in a skillet with bell peppers and onions.  Anyhow - this isn't a post about sausage - it's about Garlic and Oil Spaghetti.  We were due to hit the grocery store and the cupboards were pretty sparse, but this side dish didn't require anything that I don't normally have in the kitchen!
 

Ingredients: spaghetti noodles, extra virgin olive oil, crushed red pepper, garlic, parmesan cheese.


Diretions: Prepare the pasta as directed on the box.  While that is cooking, in a skillet or sauce pan, saute minced garlic with crushed red pepper.  I used minced garlic from a jar, but fresh garlic would be even better. I used about 1/4 cup of olive oil, 2 teaspoons of red pepper and 2 tablespoons of garlic, which is approximately 4 cloves. This can all be adjusted depending on your personal taste. After you have drained the pasta, add the oil sauce to it. Sprinkle on some parmesan cheese before serving. You can garnish this with parsley if you want to add a little pizazz to your dish.


This dish had a great flavor, but I found it to be a little teensy bit bland for my taste.  When I make this again, I will add more garlic and red pepper.

Sunday, January 12, 2014

Ma! The Meatloaf!


I don't think anyone in the world has ever thought they would like meatloaf... until they actually ate it.  As a kid I would REFUSE to eat meatloaf because it just sounded so gross.  Bread comes in a loaf.  Meat does not.  My mom might as well been trying to feed me horse liver.  Then one day, when I was about 10 years old, I ate it.  And holy crap! Meatloaf is delicious.  (Eric had a similar experience.  Except he was 30.  And my mom was me.)


Ingredients: 1 lb. ground beef, one packet onion soup mix, parmesan cheese, one egg, 2/3 cup bread crumbs, ketchup (This recipe is good for 3 servings, I normally double it so we have leftovers for the next couple days.)

Combine Stuff: Add the egg, bread crumbs, about 1/2 of the packet of onion soup mix, a squirt of ketchup and a couple shakes of the parmesan cheese to your ground beef and mix it all together.  Go on, use your hands, get dirty!  (P.S. Let's all give Eric some credit for being a good camera man and taking the next couple photos for me, since my hands were meatloafy.)


Turn your meat into loaf: Cover a baking sheet with foil and spray it with some nonstick spray. Grab your wad o' meat and form it into the shape of a loaf on the baking sheet.
 

Ketchup and Season: Season your loaf with some garlic powder and salt and pepper. Squirt some more ketchup on top.

Bakin' Time: Pop that sucker into a preheated 350 degree oven for 1 hour.  If you double the recipe, you'll need to keep it in for about 1 hour 15 minutes.


Lucy really wanted some meatloaf.  So I guess I was wrong about EVERYBODY thinking meatloaf sounded gross.  She thinks it sounded delish.  Which it was.

The Dog Blog: Meet Lucy


I'd like to introduce you to our pup, Lucy in the Sky with Diamonds. Anyone who knows me, will hear me talk about Lucy approximately 57 times an hour because I am obsessed.  But who wouldn't be?  Did you look at that face?  Lucy enjoys sharing pillows at bedtime, watching for squirrels out the window and batting ice cubes around the living floor.


We adopted Lucy in December of 2012 from POET Animal Rescue. Lucy's mom, a basenji mix, was brought to the rescue with bad case of demodectic mange.  She was pregnant with Lucy and her brothers and sister, Hey Jude, Rocket Man and Mustang Sally.  Lucy weighed 9 pounds when we took her home.  So tiny!
 
 
Though Lucy had a clean bill of health when we adopted her, after only a few weeks in our home, she developed mange, like her mother.  We were shocked as we watched our little fluff ball lose her fur on her face, legs and belly.  Even though she looked like she could have been cast in The Walking Dead, our zombie puppy remained sweet and spunky.

 
Lucy's fur came back before spring and by mid-summer she was officially mange free.  She's only been part of our family for just over a year now, but it's hard to remember life before Lucy!


Thursday, January 9, 2014

Anthropologie Knock-Off Confetti Glasses


A while back, while walking through Wal-Mart I spotted a 4-pack of rocks glasses for $2. At the time I had no use for them, but couldn’t pass up such a good deal and I ended up buying three packs of them.  After spending over a year on the floor of my office, I finally pulled them out last month during craft night and transformed them into cute little speckled candle holders.


Supplies: Elmer’s Painters paint pens, glasses, rubbing alcohol

Clean the glasses: Wipe the glasses off using rubbing alcohol to get off any dirt or oil and then avoid touching the surface you are going to paint with your fingers.  The paint with stick better to a clean glass. Let the glass completely dry before painting.


Dot Dot Dot: I decided to use three colors for each glass. You can do whatever floats your boat, but any more than three will probably start to look a little busy.  But if that’s what you like, dot on sister! Starting with the bottom of the glass, paint little dots up the side about 3/4th of the way up with your first color. Once that layer is dry, use your second color and dot 1/2 way up the glass.  Once that layer is dry, use your third color and dot up 1/4th of the way. I kept my dots more concentrated on the bottom my glass.

Note: You could also do this with glass paint using the back of a paint brush for the same effect.  Paint pens worked awesome though, because you don’t have to worry about making a mess!


Use them as a decoration or use these to store odds and ends, like Q-tips or pencils.  I popped in a cute washi tape covered tea light (check out my how-to on those here) and called it a day.